Inspiration for this came when I and my wife went to Manali two years ago.
 |
| Manali-Rohtang |
We were wandering through the local markets when we came up to a shop that sold locally made handicrafts. My wife decided to choose small utility stand for her cosmetics among a few designs that were available.
I found those stands quite flimsy and untidily finished and told her that I can make a better one back home. The bet was on!
I had a few pieces of 5mm plywood and decided to use them for the purpose. I imagined a simplistic design that can be expanded as needed. It was supposed to be a base and top with holes for the cosmetics. Base and top supported by circular dowels. I decided to add a nested stand inside a larger outer stand to allow expansion when needed. For the nesting to work, supporting dowels had to be placed cleverly.
I drew a plan first using hand sketches and then made a correct-to-scale drawing on paper. This drawing was pasted on plywood and cut carefully.
 |
| Plan of the stand |
 |
| Plan for nested inner and outer stand (right) |
 |
| Plan pasted on the ply after providing gap for cutting |
 |
| Both top pieces cut |
I was able to obtain very fine cut edges using
this trick to cut plywood even when using Jigsaw on a 5mm thin plywood.
 |
| All ready for next steps |
After cutting, it was time to make those holes for the cosmetics that I drew on the plan. It is important to make markings so that each hole ends up where it is meant for.
 |
| Marking the hole starting points |
 |
| Starting positions marked. Now drill bit will not slip when hole is drilled. |
 |
| All pilot holes drilled |
 |
| Making the pilot holes larger as possible |
Smaller holes are for supporting dowels. I did not want to scour the top layer of plywood with hole saw or similar tools, so I decided to grind the wood off to make a hole.
This was not the best method as I soon figured out and was pretty messy. The cone grinder that I mounted on a drill machine to grind the wood off would just burn the wood. Leaving a black dust instead of what should be sanding dust.
However, after slow and patient drilling, the edges of the holes came out to be super-smooth with a burnt-wood look. I think that was kind of nice finish as well!
 |
| It was messy and somewhat smoky indeed. Drilled pilot holes to make way for grinding bit. |
In the image above, the two smaller holes that are visible in the middle are going to receive supports for the upper and lower part of the stand.
For this, there was a need to make some wooden dowels, now that ready made dowels are not available in the market, I had no choice but to make them on my own. The project needed 90 dowels differing in sizes for outer and nested stands.
For this I took wooden strips approximately 1cm by 2cm wide and around 30 cm long. Then split them into two almost square profiled pieces.
 |
| Approximate square strips |
I used a hand planner to smooth out the square profile. Before using the hand planner. I used a craft knife to trim some of the extra wood so that I have to make much less labor with the hand planner.
 |
| Approximating the supporting dowels |
A hand plane was used to smooth out the corners leaving an octagonal profile.
 |
| Smoothing out the corners to achieve approx round profile |
Further using a low depth cut on the plane, create approximately round sticks.
 |
| Converting square profiled pieces into octagonal |
 |
| Planing off the edges |
 |
| A temporary jig was used to measure when the dowels were perfect size for the stand |
 |
| Final shape-up |
Finally I used a drill to sand off the dowels to a perfect and smooth circular profile.
 |
| Rough dowel ready for finishing |
One should practice some caution when using drill in this manner because sandpaper used became pretty hot at times. Also when you grip the sandpaper around a rotating dowel, it would tend to stick and turn along with the dowel. Sometimes, in my case, it dislodged the dowel and at others, it just threw the sandpaper away.
 |
| Finishing in progress |
 |
| No larger than this, no smaller than that |
 |
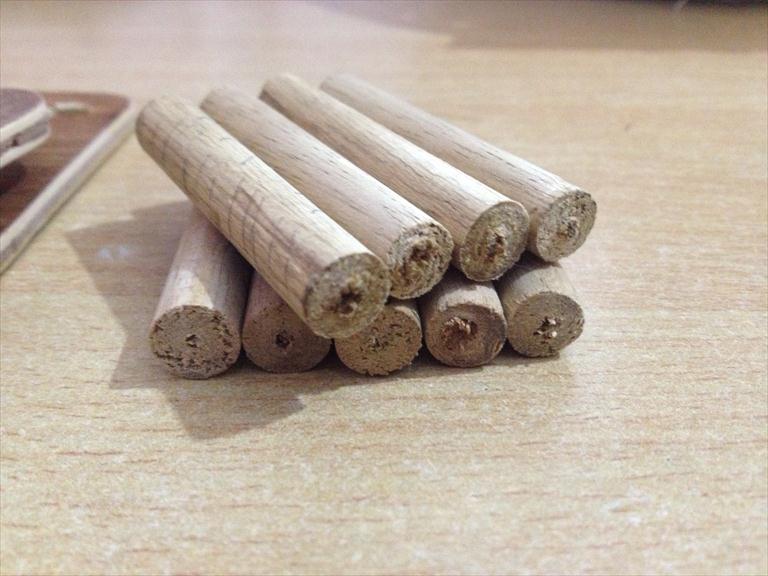
| Finished and unfinished dowels |
Then was the time to cut them to pieces fit for the height of the stand. I found out that the best way to avoid slicing was to cut them using a small toothed hack-saw blade when turning in a drill at high speed.
 |
| Cutting small pieces of posts from wood |
 |
| Moving drill, cut in progress. |
 |
| Clean cuts obtained from the drill and blade combo |
Now that the dowels are ready, it was the time to finish off the top and bottom sides of both outer and inner stands so that the are read to receive the supports. So I bound up the semi-finished top and bottom side in a vice and carefully files the profiles.
 |
| Filing the profile pattern |
 |
| Profile pattern close up |
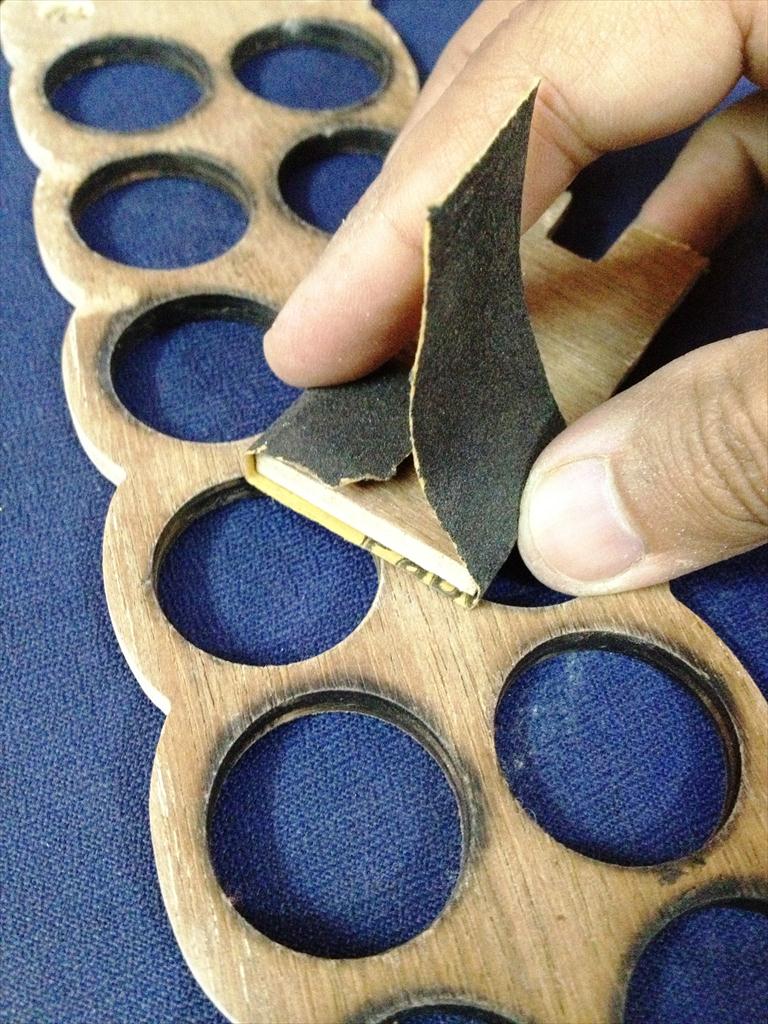
Extra wood from the edges was also files off using a sanding belt (of course without a belt sander!)
 |
| Some fine tuning there |
 |
| Roughly sanded and almost ready |
Then the top and bottom edges were also sanded with a fine paper to remove all the residual wood and raised wood that was left from previous operations. Care was taken not to sand too much to expose the lower layer of the plywood.
 |
| Fine sanding |
 |
| Fine sanding the edges as well |
Before fixing the posts to the top and bottom part of the stand, it was necessary to file the holes to make sure that the fit it perfect. Not too loose and not too tight.
 |
| Filing the holes to a right size. |
After filing, one side of the posts were fixed on the stand. I eyeballed the posts to make sure that they are approximately aligned.
 |
| Fixed posts and aligned by hand while still wet |
 |
| Alignment came out pretty well even without using any jigs/presses |
The base of the stand was also fixed and aligned while the glue was still pliable. Some part of the posts was left flowing out of the base so that it can be ground off afterwards for perfectly flush finish with the stand.
 |
| Grinding off extra length of the posts |
 |
| Carefully ground up and ready for finishing |
Here is a photograph of the stand before any polishing and all.
 |
| Before polishing pic 1. |
You can note that the holes from the inner and outer stand align with each other so that there are three different options to use the stand with varying capacities.
1. When the stands are inserted all the way, there are 12 usable holes.
2. When the stands are inserted halfway, there are 18 usable holes.
3. When the stands are pulled apart each other, there are 24 available holes.
So one can vary the capacity according to need.
 |
| Before polishing pic2 |
 |
| Before polishing pic3 |
 |
| Applied simple lacquer for finish. |
Simple lacquer was enough to close the grains and also to bring out the grain of the wood. Although this was not a very exotic piece of wood, the finish came out pretty nice and presentable.
 |
| Ready (full capacity use) |
 |
| Ready (half capacity use) |
 |
| Ready (half capacity use) |
 |
| Ready (compact use) |
 |
| Profile came out good and the layers of plywood gives an impression of inlay work |
Finally the stand was ready and was handed over to the customer who made the payment with a big smile! :-)


